Showing posts with label Home Decor. Show all posts

Thursday, April 9, 2015

EASTER 2015

Hope Everyone had a wonderful Easter weekend filled with joy and lots of love. Our Easter was wonderful, we hosted a small gathering with great friends and their lovely families along with a surprise visit of the Easter bunny. 
We were blessed with an amazing meal and lots of fun for the little ones and not so little ones. Here is a small recap of our Easter Sunday. 

Have a good one yall!! Thank you for stopping by. 
XO,Nancy!!!!

Tuesday, March 31, 2015

HOMEMADE SPRING TABLE RUNNER

Hey yall!! As we all know Spring is finally here! I don't know about you guys, but I'm very excited. Flowers are blooming, the sun is shining and colors are brighter! 
It's also that time of the year when many of us are changing stuff around, doing a little spring cleaning and decorating. You know... getting the spring spirit in our homes. After all it's been a heck of a long winter and we're all ready for some nicer weather. 
Today I'm pleased to share this floral homemade spring themed table runner that I created for my home. If you ask me, a beautiful table setting is always the easiest way to welcome any season and this little DIY says Welcome Spring all over it!    
Supplies:
  • Felt in various colors
  • hot glue gun
  • scissors
  • needle
  • thread
  • green embroidery floss
  • "23 x 13" piece of fabric
  • embroidery hoop

Optional:

  • Sewing Machine ( or you can also hand sew)
First I finished the raw edges of the fabric using the zigzag stitch on my sewing machine, just to keep the fabric from unraveling. Then I folded the edge of  my fabric into 1/2" and 1/2" hem (this is easier if you iron the hem down before you sew). I used my sewing machine to sew along the folded hem(this can also be done by hand).
     After I sewed my hem down and made it all around the fabric, I started making my felt flowers in various colors and sizes.  
There's so many beautiful styles of felt flowers you can make. I stuck with two simple ways. The first one is the daisy looking one. I just cut a strip of felt, folded it and cut little slits along the folded edge. Then using a small piece of scrap felt, I made a little ball for the middle of the flower. I glued the little ball to the very tip of the flower strip. Then I rolled the strip up creating a pretty little flower. 
The second style is what I call the portulaca. First I cut up a bunch of felt squares and then cut them into petals. After I had several cut petals, I then hand sewed them together using a needle and thread. 
I attached eight flowers on each end of the runner using a needle and thread. Once I attached all the flowers I hand embroidered leaves on my little runner using a needle and green embroidery floss.  
And that's It my friends!! I must admit I absolutely LOVEEE how my spring table runner turned out. It's by far not perfect, but it gots tons of personality and most important it just screams out SPRING every time you look at it.   
Also how incredibly cute is this little blue thrifted creamer filled with wildflowers that I picked from the woods!!!! I just love getting creative with my thrift finds, it's soooo much fun...
Have a good one you guys!

XO,Nancy!! 


Thursday, February 5, 2015

HOW TO INSTANTLY ADD GREEN TO ANY ROOM DURING THE WINTER

Ever think about using evergreen tree branches in vases or jars to decorate your home? Well me neither until not so long ago. Now I absolutely love it! Not only are they gorgeous and long lasting but they add so much character to any room in your home for about $0. To be honest with you, I don't even think about buying flowers anymore. I just go on walks and come back home with little bouquets of pretty leaves, and scatter them all around the house.     

 Here is a small bouquet of Tea Olive Tree clippings sitting inside of a thrifted ceramic round vase as the centerpiece of my dinner table.
 I Love how the sunshine makes the backside of the leaves look white and silverish!   
 And these exquisite Magnolia boughs seem to be thriving rather well in this recycled jug for almost four weeks now. Yes, Yes for weeks!! I seriously think they might just start rooting and give me a magnolia tree.   
The leaves are huge and dark green with a light brown fuzzy backside. They're super gorgeous and stylish, If you ask me! 
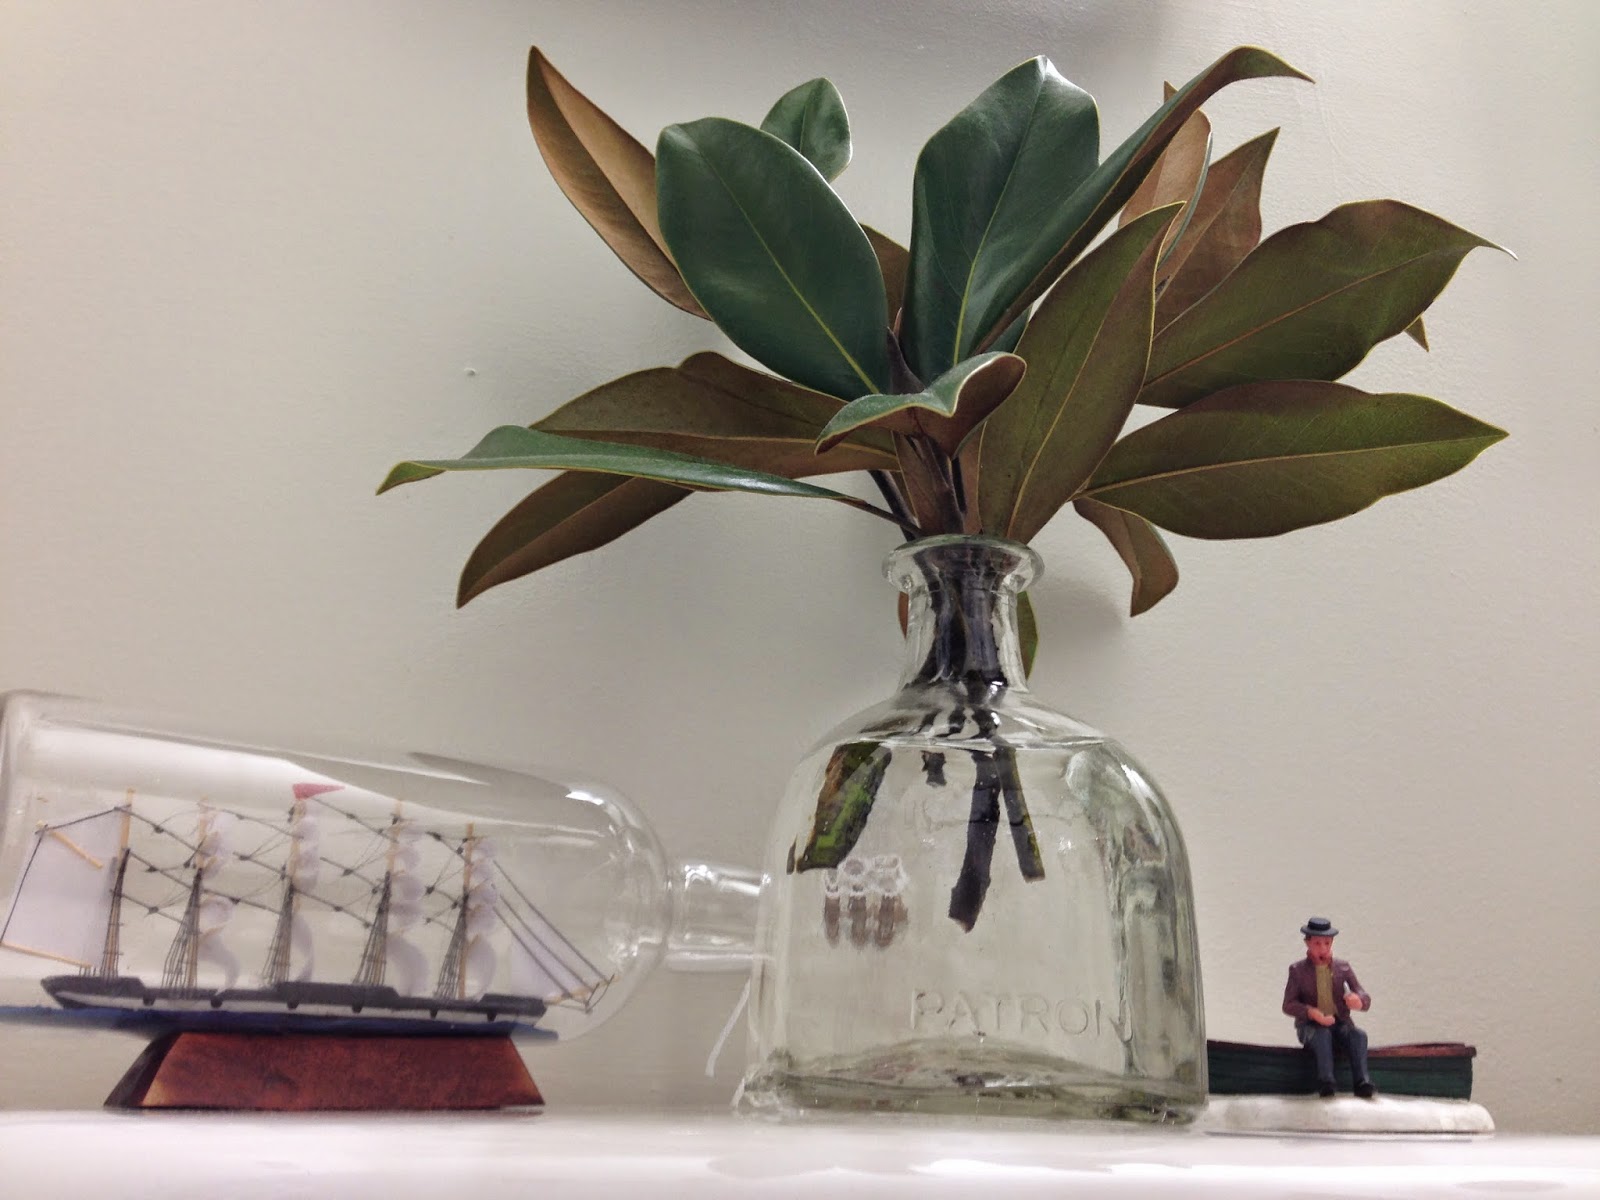
 Like I said these babies are scattered all over my home. Here goes one of my favorite arrangements. A few Magnolia branches inside a recycled Patron bottle in our restroom. By the way this one has also been thriving well for almost 4 weeks!
Using evergreen tree clippings instead of flowers as decorative arrangements is a very simple and frugal way to instantly add a touch of green to your home during the winter months. 
I love how they're long lasting and they will make any room seem so put together!

XO, NANCY!!


Tuesday, July 22, 2014

DIY URBAN OUTFITTERS COPYCAT JEWELRY STAND

   
This weekends thrift store trip was a total success as I picked this stand for 75 cents! At first I thought score I finally found a jewelry stand to display some of my necklaces and bracelets,simple but it'll do. Then I thought hold up forget simple! I knew it had potential to be much more! So I looked around and Urban Outfitters inspired me to create my fancy little jewelry stand. Below is a picture of the Urban outfitters stand that motivated me. Let me point out that the price for the UO stand is $39.00 while mine only cost me 2 bucks. I dont know about you but I'm thinking heck yea lets DIY!!

                                                Plum and Bow Printed Dish Jewelry Stand

Supplies I used were; Thrifted decorative souvenir plate, thrifted stand, and Loctite Super Glue Gel Control.
This DIY is very straightforward. All I did was super glue the stand to the top of the decorative plate. Can't get any easier!  


I am beyond pleased with how my jewelry stand turned out. Gotta love thrift store shopping! 
XO, Nancy!!